
Ready, set, let’s make a blanket.
Since Valentine’s Day is right around the corner, I wanted to make a blanket that was more than just a Valentine’s Day Gift. A lot of people don’t get into the holiday. Some certainly don’t care about spending a Hallmark holiday with anyone, especially if they don't want or have a significant other in their lives. Others feel it’s just another day on the calendar. Many find it a wonderful romantic holiday to spend with the ones they love. This certainly includes their furry four legged babies. This is why I decided it would be perfect to make a blanket that represented unconditional love.
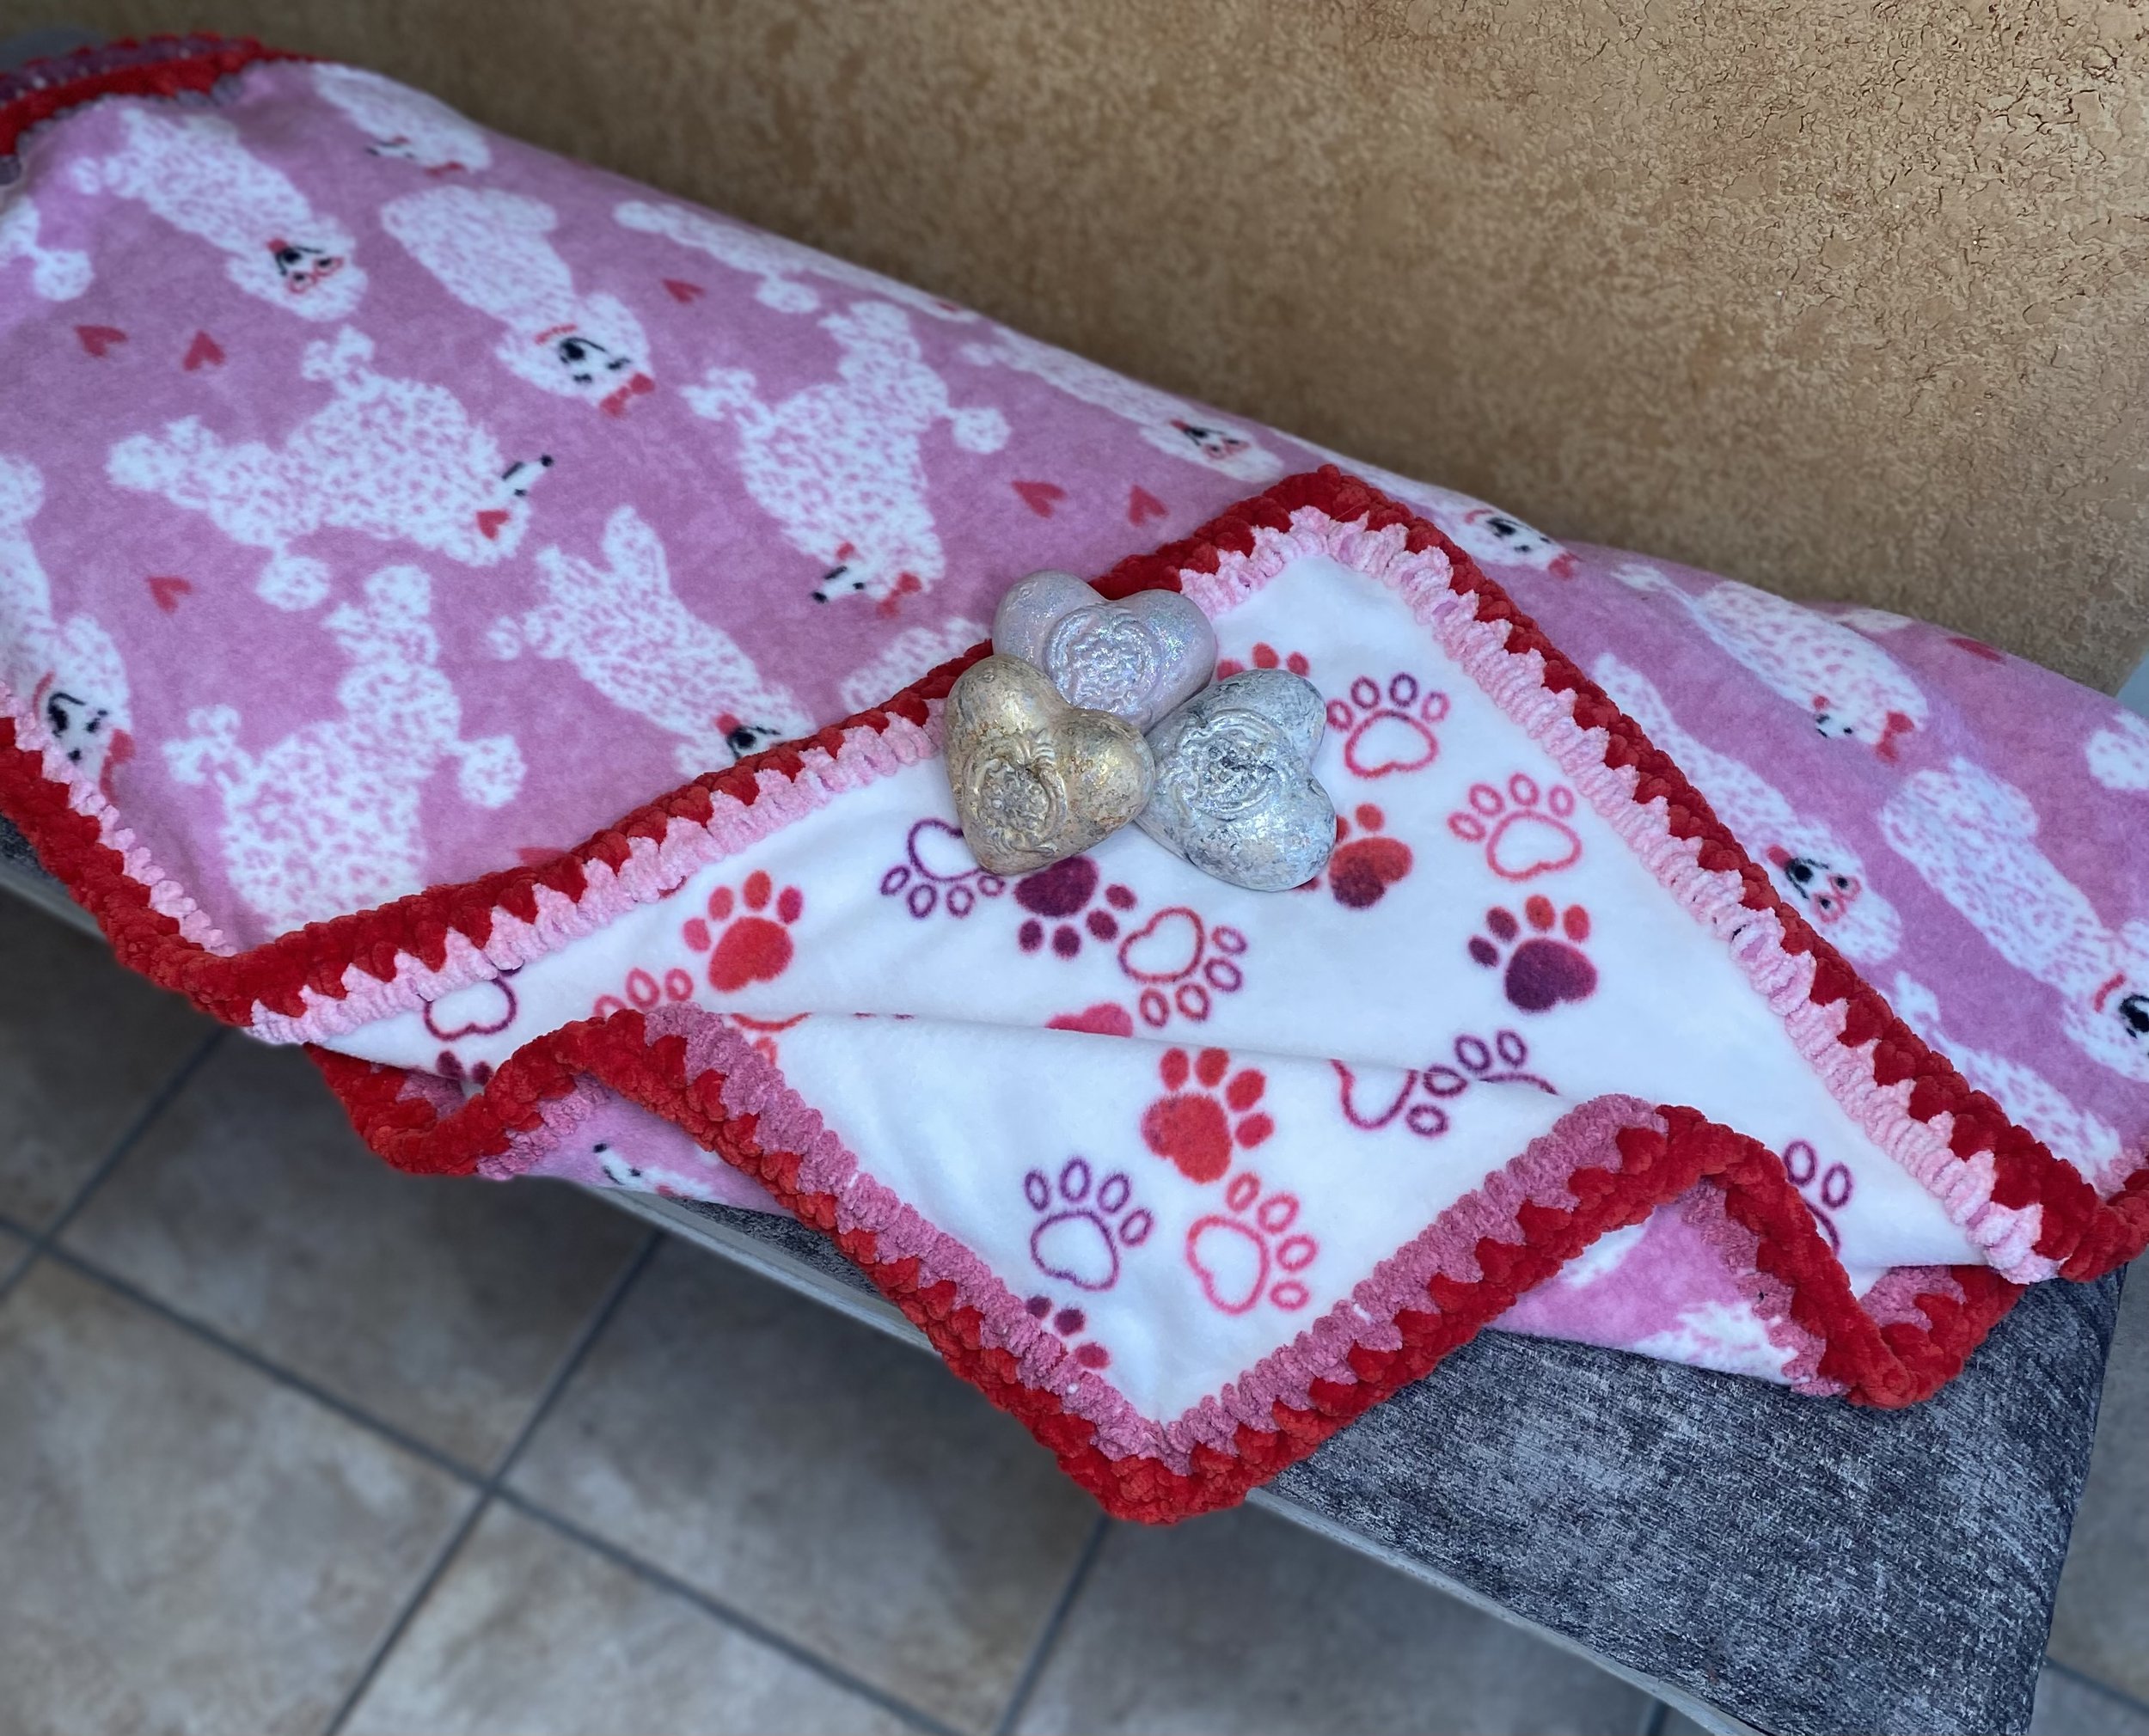
This remarkable blanket can certainly be given as more than a Valentine’s Day gift. It can be shared with a dog lover, dog groomer, or anyone who dreams of one day owning a beautiful poodle. The white poodle print is adorable and the paw print on the reverse side in the shape of hearts is darling. It’s assembled with Anti-Pill Plush. Joann’s named the fabrics Poodle Hearts and Pink Tossed Paw Prints. I crocheted the blanket with Bernat Baby Blanket Dapple yarn in Rose only using approximately half the skein on the 1 yard blanket. I used Michael’s Sweet Snuggle in Red. This took a little over a skein of yarn. I just love the way it turned out!
This post may contain affiliate links. I may receive a small commission as an Amazon Associate for purchases made through links on this website. I only share links to items that I use or believe in.
What You’ll Need For The Entire Process Is Listed Below
1 yard of Fleece Fabric for the front
1 yard of Fleece Fabric for the back
A very sharp pair of scissors (Fiskars scissors work fine for me, but I do have to sharpen them more often when working with Luxe fabric.)
A Rotatory Cutter (There are a plethora of different rotary cutting blades available.) I personally use Fiskar. Decide which one works best for you.
Self Healing Cutting Mat (I use the Sullivans Gridded Cutting Mat. It's made in the USA and fits perfectly on top of most home tables. It's also great for the floor.)
Long Acrylic Ruler with horizontal and vertical markings (Fiskars sells these in multiple lengths and sizes.) I just recently purchased a Omnigrid Non-slip Rectangle Quilting Ruler with Removable Lip. It's awesome! The 0.125-inch removable lip adheres to the mat and prevents slippage. ( I purchased mine from Joann’s)
Straight Pins
1 yard Poodle Hearts Anti-Pill Plush
1 yard Paw Prints Anti-Pill Plush
Bernat Baby Blanket Dapple in Rose 1/2 Skein
Michaels Sweet Sngglels in Red 1 Skein
Crochet Hooks Size 4 MM and size 6.5 MM (Everyone has their favorite hooks but for me, I love hooks by Susan Bates.)
Although some of these items may be an added expense to your creative toolbox, I honestly believe if you invest in them now, it will make the creative process run more smoothly in the future.
You can read my blog post “Let's get Squared” to learn how to square up both sides of your fabric before starting.
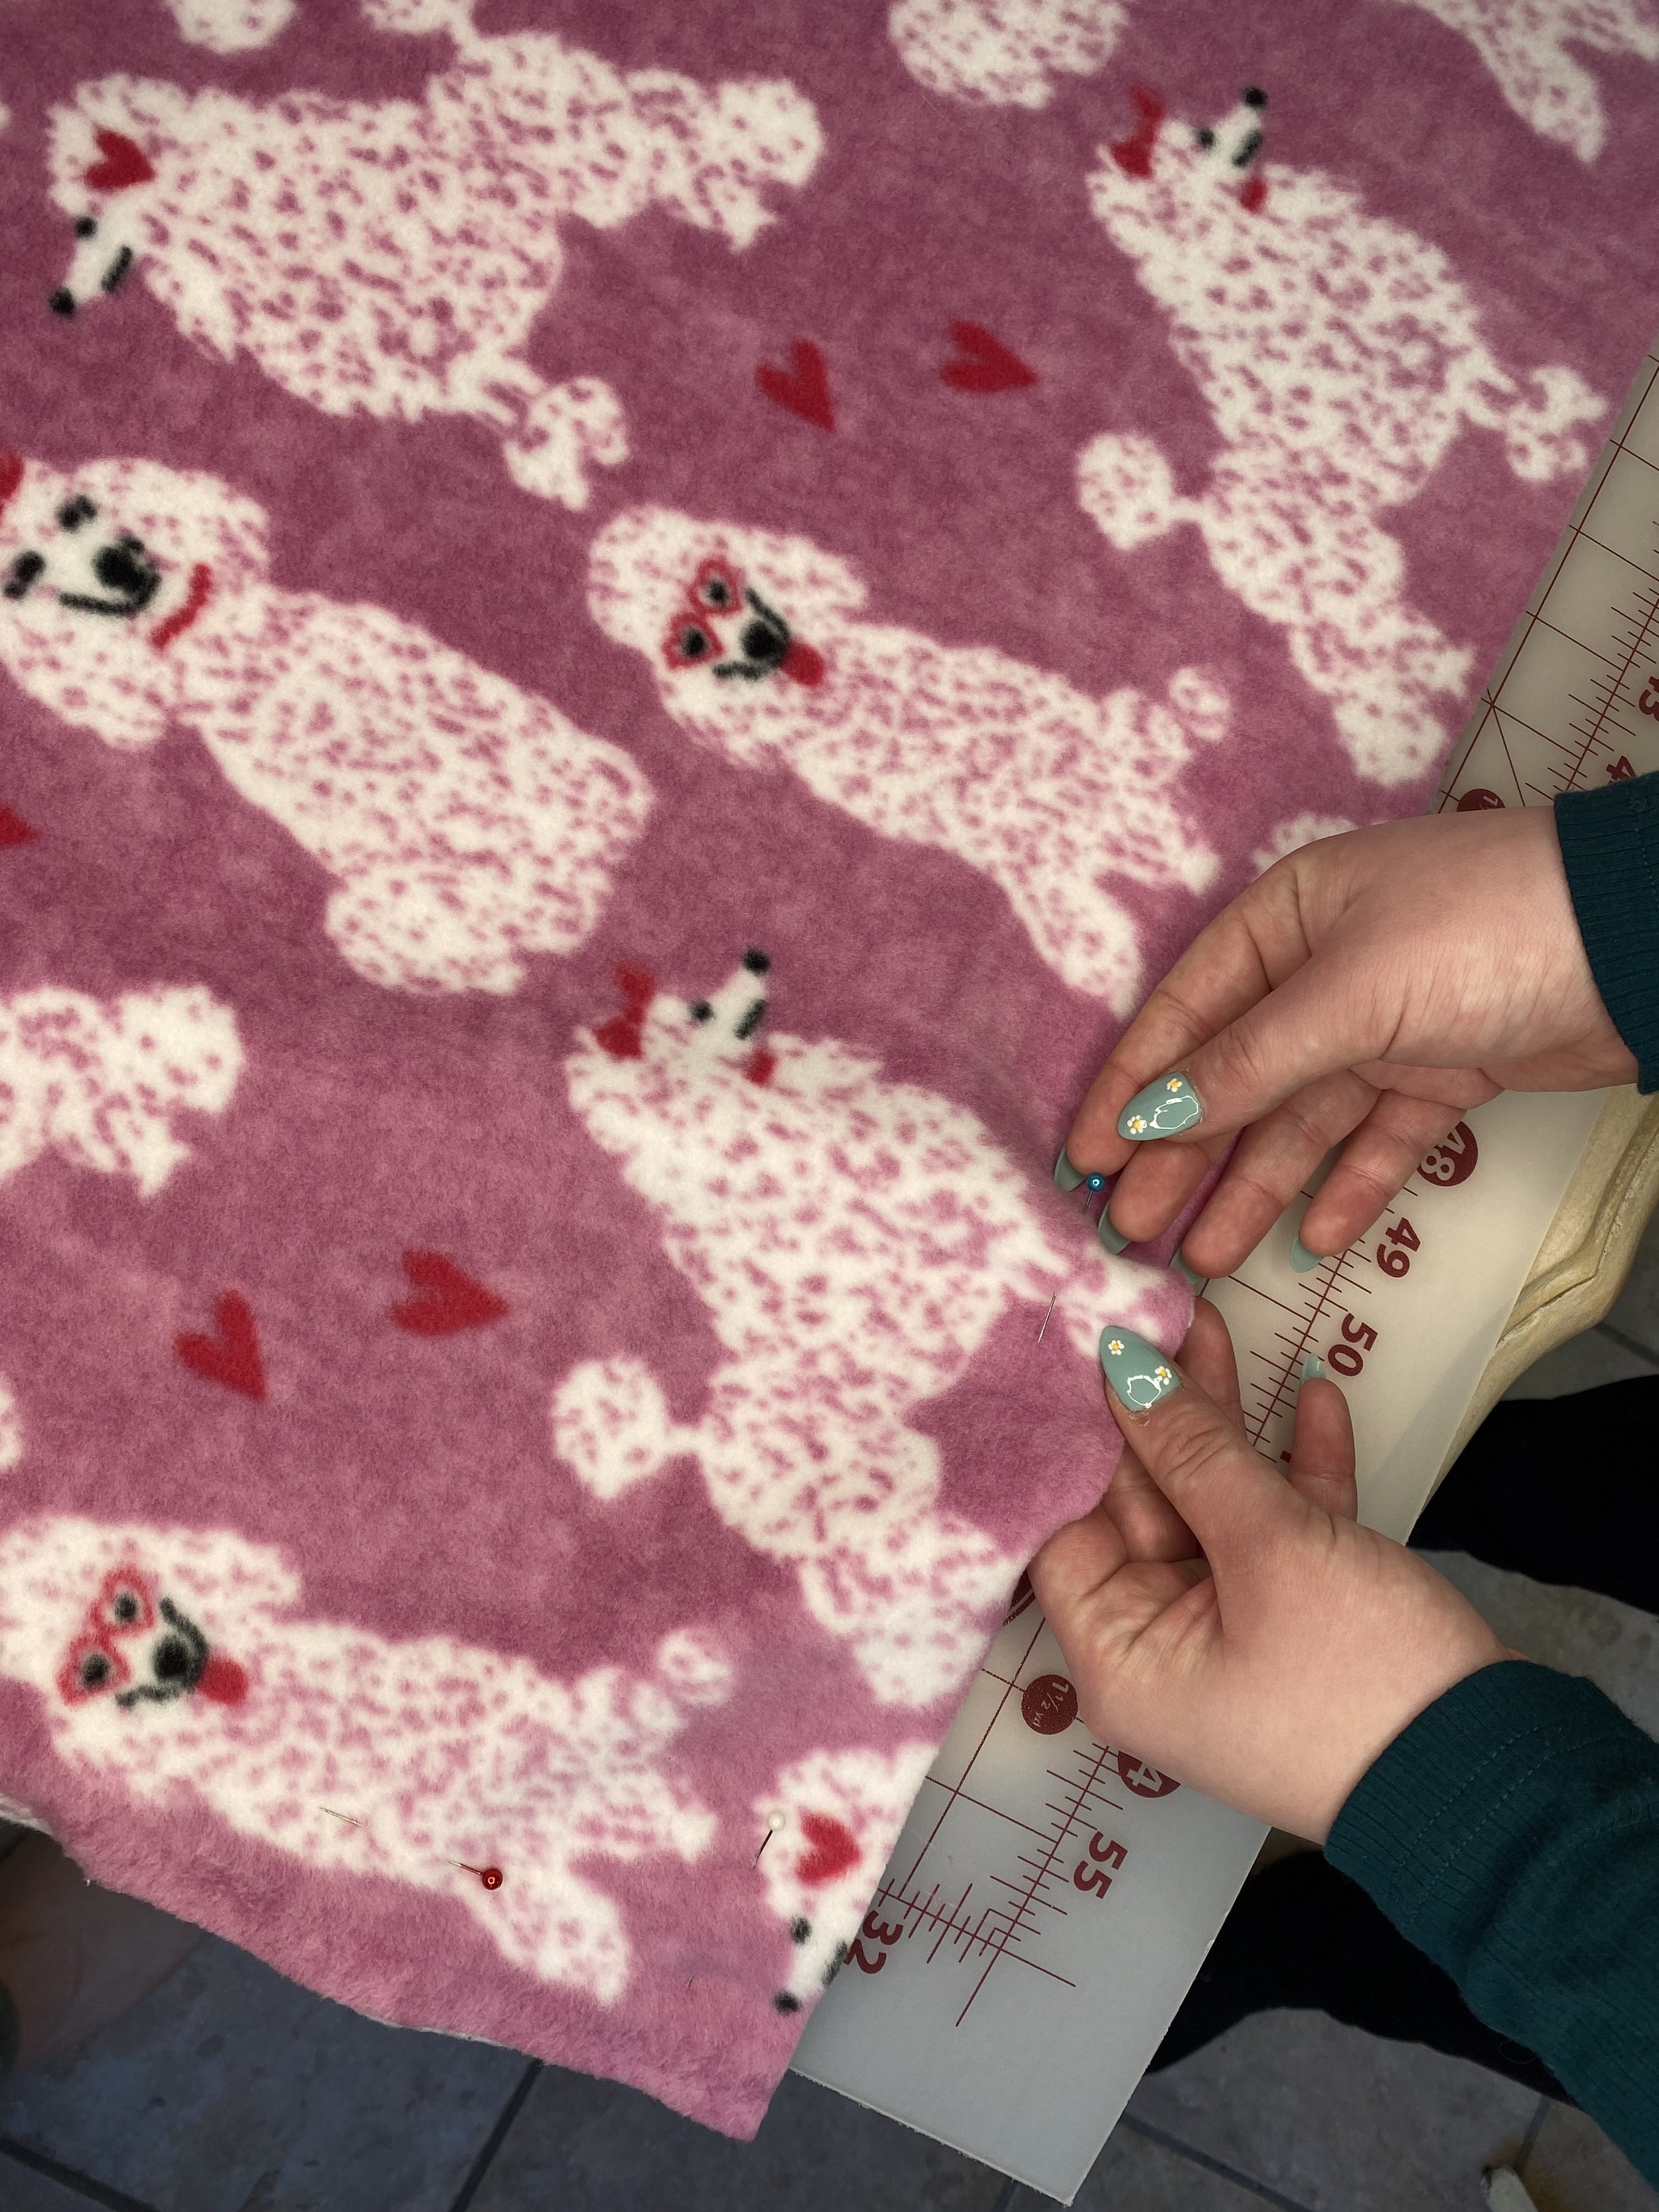
After you’ve squared up your fabric, you’re ready to pin the sides together. This is done by putting both pieces of fabric face up or right side on top and right side on bottom. In other words, the wrong side of your fabric is touching together in the center. It’s important to also notice if your fabric has “words” or “symbols” on them that they are both facing the right direction. Nobody wants backward words or upside-down symbols or creatures on their blanket, especially if you don’t notice it until it’s all put together. Totally a bummer.
Most fabric is generally folded in half on the bolt so it comes with a nice fold down the center. This is also a lot of help when matching up your fabric. You can lay your folds on top of each other to help get you started. Now you’re ready to pin!
This looks great!
Time to use the Rotary Cutter Skip Blade. Since you’re only working with 1 yard today, it’s a little easier to get the material to spread out smoothly and prepare it for cutting your holes.

It’s extremely important to measure with your ruler approximately 1 inch from the edge of your fabric so this will give you enough room to roll the cutting blade and keep your fingers safe. Give the cutting blade some firm pressure as you’ll be cutting through two pieces of fabric. Remember~DO NOT lift your blade once you start cutting. Every hole must match the backside holes!

Nicely Done!
As you come to the end of each side, make sure you don’t overlap your holes. Turning the corner, look closely at the end of your last holes cut, and line up your holes before putting your blade down to start the next side. Continue this process until the entire blanket has holes on each side.

Turning the corner can be a bit tricky. Make sure not to overlap the holes with the cutting blade.
With all the holes cut, you can now begin to assemble your blanket with yarn. I suggest using a size 4 mm G hook. It slides through each hole quite easily without force and doesn’t stretch or damage the fleece fabric. It also gives you room to use a soft, fluffy yarn as a border.

Using the Bernat Baby Blanket Dapple in Rose begin to construct the two pieces of fleece fabric together with a double crochet (DC).
Double Crochet (DC)
With a starting loop on the hook.
Yarn over. Insert hook into both pieces of fabric, pull up a loop.
Three loops on hook.
Yarn over. Four loops on hook. Pull through two loops on the hook.
Yarn over again. Two loops on hook. Pull through two loops on the hook.

Insert hook into front and back holes. Making sure to line up your holes perfectly.

Yarn over and pull through two loops on hook. Two loops on hook. Yarn over and pull through last two loops on hook.
Double crochet (DC) all the way to the end of one side of the blanket. As you come to the corner, start by tucking down the edge of the extra fabric down. Put 1 (DC) and one (CH) in the corner hole then another (DC) in the same hole. Do this in every corner. It will give you a nice rounded corner and allows both pieces of fabric to hold snuggly in place without slipping. It also gives the corner a neat clean appearance.


Make sure to slip-stitch your last stitch and tie off your yarn.
Now that the blanket is completely sewn together with your (DC), you're now ready to attach a border. Since this blanket is for a dog, I've decided to add something a little less fancy or intricate. I thought it would also be easier for you to learn this simple border and at the same time give the blanket that extra something to make it pop. That’s why I chose a Half Double Crochet. (HDC) with a single chain (CH) stitch in between with skipping 1 stitch. Let’s assemble the border!
I used a 6.5 mm hook by Susan Bates again. This is a great size hook for a medium size border and it will work perfectly with the Michaels Sweet Snuggle in Red.
Border Stitch
Place a simple starting loop on your 6.5 mm hook.
Yarn Over, pull up a loop and insert your hook into your border stitch.
Yarn over again, three loops on hook.
Pull through all three loops.
Chain 1(CH).
Skip (SK) 1 stitch.
Repeat * (HDC), (CH) 1 (SKP) 1 stitch* until you come to your corner.
Corner: Put 2 (HDC) in the corner 1 (CH) stitch and 2 more (HDC).
(SK) the next stitch and continue your repeat of * to * 1 *(HDC) 1 (CH) (SKP) 1 stitch* until your next corner.
Slip stitch (SLST) to your starting (HDC).
Make sure to tuck in and hide all your yarn tails.

Wrap yarn over to begin the border stitch.

Slip the hook in between the first row of stitches.

Yarn over and pull up a loop. Three loops on the hook.

Pull through all three loops on hook.

Now chain (CH) 1.

Skip 1 space and begin the process again with a half double crochet (HDC).

Looks great on the back too.
Work your border stitch all the way around the blanket. You’ll end with a (CH) 1. Now (SLST) into your first (HDC). Cut your yarn and work any loose ends back through your border stitch. TaDa! You’re done. Nice work.

My daughter in law made the adorable heat shaped Amigurumi. She is so talented. I’ll be sharing a lot of her work. You can find her items here: homestitchingshop@yahoo.com.